Removing wallpaper without destroying your walls comes down to one principle: soften before you pull. Score the wallpaper lightly to perforate the surface, then soak with warm water or a commercial remover for 15 to 20 minutes before pulling. Use a plastic putty knife at a shallow angle and never force it. Clear adhesive residue after removal, let the wall dry 24 hours, and prime before painting.
Most homeowners who attempt wallpaper removal end up with torn drywall, adhesive residue that won’t come off, or both. I’ve spent two decades looking at walls before painting them, and I can tell you: the damage usually happens in the first 30 minutes. The difference between a wall you can paint on immediately and one that needs repair work isn’t luck, it’s technique. The right approach to removing wallpaper takes time, patience, and the right tools, but it protects your drywall and leaves you with a surface ready to prime and paint.
If you’re planning to remove wallpaper in Auburn or anywhere in the Placer County foothills, understanding how to do this properly will save you thousands in drywall repair costs. I’m going to walk you through exactly what I’ve learned from removing wallpaper in hundreds of homes.
Why Does Standard Wallpaper Removal Fail?
The instinct most people have is to grab a corner and pull. Hard. And for the first second, the paper comes off. Then it either stops or, worse, it tears and leaves the facing stuck to the drywall. This happens because wallpaper adhesive works in layers. The paper itself is only the top layer, underneath is a layer of adhesive, and underneath that is often a facing layer (the fiberglass backing or the drywall primer the paper was stuck to originally). Pulling just rips the paper apart without loosening the adhesive.
The drywall surface is fragile too. It’s basically compressed chalk. When it gets wet, it softens. When you scrape it hard, it gouges. When the adhesive underneath shrinks while the facing above is still stuck, the paper stretches and tears. You end up with a wall that looks like someone attacked it with a belt sander.
The real issue is that homeowners don’t soften the adhesive before they try to pull the paper. They treat wallpaper removal like peeling a label off a water bottle. It’s not.

What Is the Scoring Step and Why Does It Matter?
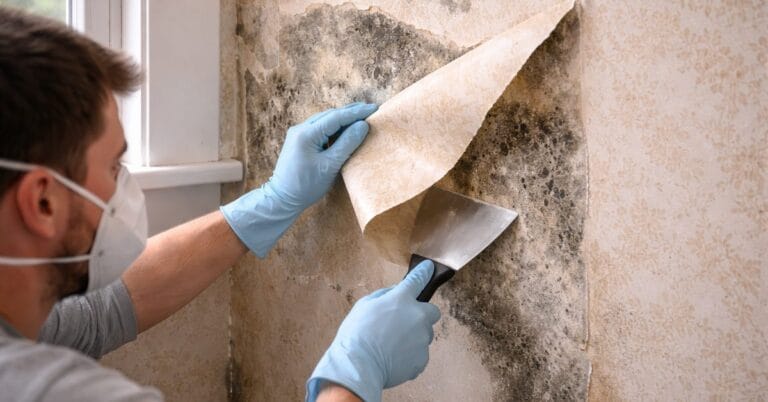
Scoring is the step that either saves your walls or destroys them, depending on how you do it. A scoring tool is a small handheld device with tiny pins or wheels that perforate the wallpaper. The goal is to create tiny holes so moisture (or remover solution) can get underneath the paper and break down the adhesive. You’re not trying to gouge the drywall or shred the paper, you’re just making it porous.
If you’d rather have a professional take care of it, take a look at my wallpaper removal services.
Here’s what I do: I hold the scoring tool at a light angle, apply minimal pressure, and roll it in overlapping circles across the wall. Think of it like texturing, not like sanding. You should hear a faint prickling sound, if you’re hearing scraping or cracking sounds, you’re pushing too hard. The drywall under the wallpaper is softer because of the moisture trapped there, so it’s easier to dent than you’d think.
- Light hand. Pressure comes from gravity and slow rolling, not muscle. Let the tool do the work.
- Overlapping passes. Cover the wall in a grid pattern so you don’t miss sections that won’t absorb moisture later.
- Check your work. Spray a little water on a scored section. It should bead and run, not sit there. If it sits, you didn’t score enough.
When Do You Dry Strip vs. Score and Soak?
Some wallpaper comes off dry. Newer wallpaper, especially temporary or peel-and-stick types, sometimes just peels away if you find the right corner and work slowly. If your wallpaper is only 5 or 10 years old and the wall was dry when it was installed, try dry stripping first. Get a corner, use a putty knife held at a low angle, and gently lift. If it comes away cleanly, keep going slowly, section by section.
But if it doesn’t peel smoothly within the first minute of trying, stop. Don’t force it. You’ll tear the paper and waste an hour trying to pull strips. Instead, score and soak.
For scoring and soaking, I use one of two approaches:
- Water-based remover. Mix warm water with a commercial wallpaper remover solution (like DIF or Roman PRF) according to package directions. Spray it on the scored wallpaper with a pump sprayer and let it sit for 15–20 minutes. The adhesive softens, and the paper usually comes off in larger sections.
- Hot water spray. Plain hot water, applied with a garden sprayer or pump sprayer, works on many older wallpapers. It’s cheaper and less chemical-heavy. I use it for lightweight papers that are 20+ years old. Newer papers with vinyl or polyester coatings don’t absorb water well, they need a remover solution.
The key is patience. Spray, wait, spray again if needed. Don’t try to pull until the paper actually releases from the wall with light pressure. If it’s stuck, wait longer.

How Do You Work in Sections and Deal With Tears?
I always start in a corner or at a seam, somewhere I can get under the paper easily. Once I’ve scored and sprayed a section (roughly 3 x 3 feet), I wait the full time before pulling. Then I use a plastic putty knife, held at a shallow angle (15–20 degrees), and gently slide it under the paper while lifting. The knife guides the paper away from the wall without gouging the drywall.
Sometimes the paper tears. When it does, I don’t panic and rip at it. I score around the tear, spray it again, and wait another minute or two. Then I try again. Repeated scoring and soaking usually gets the stubborn section off without damage.
If the paper tears and the facing stays stuck to the drywall, I have a few options:
- Spray and wait again. Sometimes more moisture and time will release it.
- Light scraping with a plastic tool. A plastic scraper is gentler than metal. Use minimal pressure and scrape at a low angle.
- Accept it and prime over it. If a section is really stubborn and the surface feels solid (not spongy), I’ll leave the facing, let it dry, sand it lightly, and prime. The primer seals any remnants and provides a stable base for paint.
The worst mistakes I’ve seen are people trying to scrape off the facing with a stiff putty knife or metal scraper while the wall is still wet, or people who keep scraping and scraping until they’ve gouged out chunks of drywall paper. Stop early. You’re not trying to get it perfect, you’re trying to preserve the wall underneath.
How Do You Remove Adhesive Residue and Complete the Final Check?
Once the wallpaper is off, there’s usually still a layer of adhesive on the wall. Some of it is gummy, some is hard. I check by running my hand across the wall. If I feel a lot of sticky residue, I need to address it before I prime and paint.
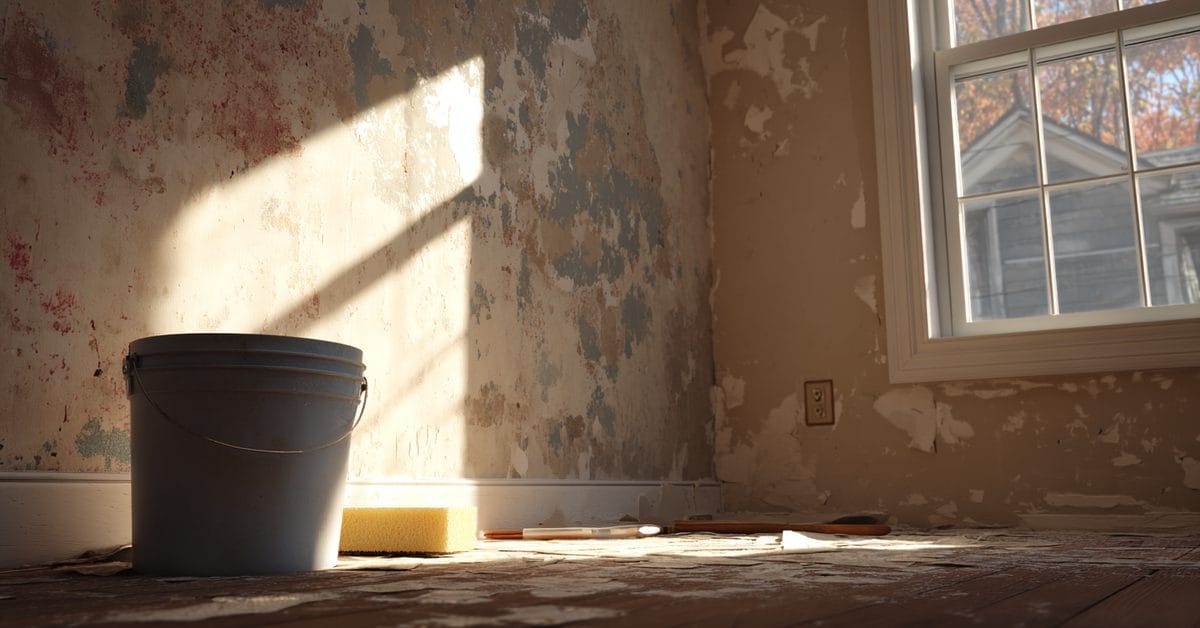
For sticky residue, I use a damp sponge and warm water. I lightly rub the wall in circular motions, not scrubbing hard, just enough to break down the adhesive layer. This takes time, and you’ll go through a lot of water, but it works. Once the wall feels smooth and dry, run your hand over it again. You want to feel some texture (the drywall weave), not a slick coating.
For hard adhesive that won’t come off with water, I try a mixture of warm water and fabric softener (yes, fabric softener, it works on wallpaper adhesive). Apply it the same way: damp sponge, light circular motions, lots of water for rinsing. Again, patience beats force.
After you’ve removed the paper and the adhesive, let the wall dry completely. This usually takes 24 hours, depending on humidity. Then inspect it under good lighting. You might see residual glue marks, slightly raised edges, or spots where the drywall facing is thin or missing. This is normal.

Should You Sand, Skim Coat, or Prime Directly?
Once the wall is dry, you have three options depending on the damage:
- Prime directly. If the wall is relatively smooth and the adhesive is completely gone, a good coat of primer (tinted to match your finish paint) will seal any remaining glue marks and prepare the surface for paint. This is the fastest route and works if the wall is only 80% perfect.
- Light sanding. If there are rough patches, raised edges, or glue spots that are hard, I sand them lightly with 120-grit sandpaper on a pole sander. The goal is to smooth the texture, not erase it. Then vacuum, wipe with a damp cloth, and prime.
- Skim coating. If the wall has gouges, divots, or large patches where the drywall facing is damaged, skim coating is the right answer. A skim coat is a thin layer (1/8 inch or less) of joint compound applied with a wide putty knife or drywall knife. It fills gaps, smooths imperfections, and creates a uniform surface. After it dries, I sand it smooth and prime. This is the most time-intensive option but delivers the best finish.
I usually prime with a primer-sealer like Kilz or Zinsser BIN. These primers lock down any remaining adhesive residue, fill small gaps, and provide excellent paint adhesion. Don’t skip the primer step even if you think the wall looks perfect. That primer is doing critical work underneath.
The primer also shows you problem areas you might have missed. As it dries, glossy patches (remaining adhesive) and dull patches (bare drywall) become obvious. You can address them before the finish paint goes on.

When Should You Call a Professional?
I’ll be honest: if you have a lot of wallpaper (more than 500 square feet) or if the wallpaper is old and heavily adhered, this is a job that benefits from professional equipment and experience. If you are also dealing with mold on the wallpaper, handle that remediation before anything else. A commercial-grade steamer, proper ventilation, and someone who knows how walls react to moisture makes a huge difference. I’ve seen homeowners spend an entire weekend on a job that would take me a day, and their walls show the strain.
That said, wallpaper removal is one of the few prep jobs a motivated homeowner can handle successfully if they follow the steps correctly: score, soak, wait, peel gently, address adhesive, let it dry, prime. The mistakes happen when people skip steps or rush.
Wallpaper removal is part of the interior painting work I take on throughout Auburn and Placer County. If you need a house painter in Auburn who handles the full prep-to-paint process, take a look at my services.
If what you have is a border rather than full wallpaper, the approach is different. See my guide on removing a wallpaper border for the specific technique.
Frequently Asked Questions
What's the best solution to use for removing wallpaper?
Hot water with a commercial remover solution (like DIF or Roman PRF) works best for most wallpapers. Plain hot water works on very old papers, but newer vinyl or polyester-coated papers need the chemical remover. Fabric softener mixed with warm water is a budget alternative that works surprisingly well on adhesive residue.
Will removing wallpaper damage my drywall?
Not if you do it correctly. The key is scoring the wallpaper first so moisture can penetrate, waiting for the adhesive to soften, and using a putty knife at a shallow angle to gently lift the paper. Rushing, forcing the paper, or using excessive scraping causes damage. The wall prep step is more important than the removal itself.
How long does it take to remove wallpaper from a room?
It depends on the wallpaper type and the room size, but expect 1-2 hours per 100 square feet for scoring and initial removal, plus another 1-2 hours for adhesive cleanup and drying. A 200-square-foot bedroom might take a full day, including drying time before priming. Professional removal is faster because of steamer equipment.
How do you remove wallpaper from drywall versus plaster?
Plaster is harder and less porous than drywall, so it takes longer for moisture to penetrate. Score it the same way, but let the solution sit for 20-30 minutes instead of 15. Plaster is also more fragile when wet, so use even lighter scraping pressure. Modern homes usually have drywall; older homes in Auburn and surrounding areas often have plaster, which is trickier to work with.
What do I do if the wallpaper tears and leaves the facing on the wall?
Score the section again, spray it, and wait another 5-10 minutes. Often the facing will release with more moisture and time. If it doesn't, you can either lightly scrape it with a plastic tool (not metal) or prime over it once it's dry. Let the wall dry completely, sand any rough edges, and prime with a good primer-sealer. The primer will lock everything down.
How do you know when all the adhesive is gone?
Run your hand across the wall after it dries completely. You should feel the drywall weave but not a slick or sticky coating. Look at it under good lighting, glossy patches indicate remaining adhesive, while matte patches show bare drywall. When the wall is primed, any remaining adhesive will show as a glossy spot. Address those before applying finish paint.