Painting kitchen cabinets successfully comes down to three things: thorough degreasing, the right primer, and a cabinet-grade topcoat. Remove all doors and hardware before you start, degrease every surface twice with a dedicated product, apply a high-adhesion primer, then finish with two coats of waterborne alkyd paint. The entire process takes 3 to 5 days. Rushing the prep or cure time is what causes cabinet paint jobs to fail early.
Painting kitchen cabinets is one of the highest-return projects you can do in a home. New cabinets can cost $10,000 to $30,000. A professional paint job costs a fraction of that. Done correctly, it holds up for a decade or more.
The catch is that cabinet painting is more demanding than regular wall painting. The prep has to be thorough, the primer has to be right for the substrate, and the topcoat needs to be formulated to handle the abuse a kitchen cabinet takes every day. Skip any of those and the paint will fail inside the first year.
This is the process I use on every cabinet job throughout Auburn and the surrounding Placer County area.
What Supplies Do You Need to Paint Kitchen Cabinets?
Having the right materials before you begin saves time and avoids stopping mid-job:
- Degreaser (TSP substitute or Krud Kutter)
- 120-grit and 220-grit sandpaper
- Sanding block
- Tack cloths
- High-adhesion primer formulated for cabinets
- Cabinet-grade topcoat paint (waterborne alkyd recommended)
- 4-inch foam rollers
- Quality angled brush for detail work
- Screwdrivers for hardware removal
- Drop cloths and painter’s tape

Step 1: How Do You Remove Cabinet Doors Properly?
Take off every door, every drawer front, and every piece of hardware, hinges, pulls, and knobs. Label the inside face of each door with masking tape and a marker so you know exactly where it goes back when you are done.
Painting with doors still hung and hardware still attached always produces a worse result. The edges do not get fully covered, the hardware leaves shadow areas, and there is no way to roll the flat surfaces cleanly without obstruction.
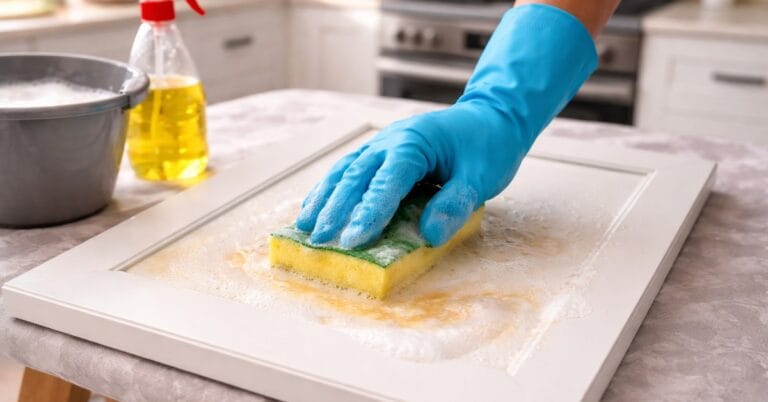
Step 2: Why Is Degreasing the Most Important Step?
This is the most important step in the entire process. Kitchen cabinets collect a film of cooking oils, airborne grease, and hand oils that is nearly invisible but will destroy adhesion if it is not removed before primer goes on.
Use a dedicated degreaser, not dish soap, not all-purpose spray. Products like TSP substitute or Krud Kutter are formulated to break down the kind of buildup that accumulates on cabinet surfaces over years. Two passes is the standard: the first removes the bulk of the contamination, the second catches what the first left behind. Rinse every surface with clean water after degreasing and let everything dry completely.
For a full walkthrough of the degreasing process, see how to degrease cabinets before painting.

Step 3: How Do You Sand Cabinets for Best Adhesion?
Start with 120-grit to scuff the existing finish and give the primer something to grip. Follow with 220-grit to smooth the surface. You are not trying to sand through the existing finish, you are creating a uniform texture that the primer bonds to well.
After sanding, wipe every surface with a tack cloth. Dust left on the surface telegraphs through the primer and paint as texture.

Step 4: What Primer Should You Use for Kitchen Cabinets?
Use a primer specifically formulated for cabinets and furniture, not a standard drywall primer. Apply with a foam roller on the flat faces of doors and drawer fronts. Use a brush to work into recessed areas, inside edges, and any detail work. Keep the coat thin and even.
Let the primer cure fully, at least 24 hours. Sand lightly with 220-grit after the primer cures, wipe clean with a tack cloth, then move to the topcoat.
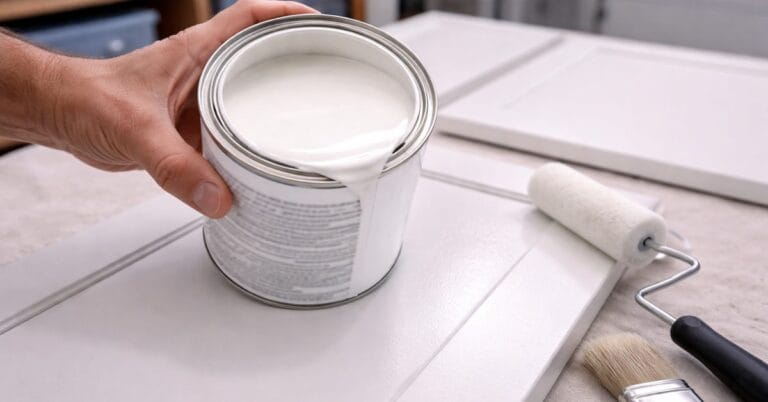
Step 5: How Do You Apply the Cabinet Topcoat?
Use a cabinet-grade paint. For most cabinet jobs I use a waterborne alkyd formula, it has the leveling and hardness of oil-based paint with a faster dry time and easier cleanup. It self-levels as it dries, which eliminates most of the brush and roller texture that shows up in cheaper formulations.
Apply with a foam roller on flat surfaces and a brush for edges and recessed areas. Two coats minimum. Sand lightly between coats with 220-grit and wipe clean before the second coat goes on.
For specific product recommendations, see the right paint for kitchen cabinets.
Step 6: How Long Before You Can Reinstall Cabinet Doors?
The paint may be dry to the touch in a few hours, but it takes 2 to 4 weeks to reach full cure hardness. Installing hardware and rehinging doors before the paint has cured means the surfaces will dent and scratch much more easily. Wait at least 5 to 7 days before reinstalling.
What Are the Most Common Cabinet Painting Mistakes?
- Skipping degreasing or doing it with the wrong product. The most common cause of cabinet paint failure. No amount of good primer fixes a greasy substrate.
- Using the wrong primer. Standard drywall primer does not bond properly to cabinet surfaces. Use a high-adhesion primer formulated for hard surfaces.
- Using wall paint instead of cabinet-grade topcoat. Wall paint is too soft for cabinet surfaces and chips at door edges within months.
- Painting with doors still hung. Edges and detail areas do not get fully covered, and flat surfaces cannot be rolled cleanly.
- Rushing cure time. Dents, scratches, and sticking doors are the result of reinstalling too soon.
When Does It Make Sense to Hire a Professional?
Cabinet painting is achievable as a DIY project if you have the time, patience, and right materials. The prep work alone typically takes a full day for a standard kitchen. Where most DIY cabinet jobs fall short is in the finish quality, brush and roller marks, uneven coverage, and early chipping are common when prep is rushed or the wrong products are used.
If you are in Auburn, Granite Bay, Rocklin, or the surrounding area and want a professional finish, take a look at my cabinet painting services.

Cabinet painting is the main service I offer across Auburn and Placer County, but I handle all kinds of residential painting work. If you’re looking for a residential painter in Auburn for other projects around the house, take a look at what I cover.
Ready to Transform Your Kitchen Cabinets?
Serving Auburn, Granite Bay, Rocklin, and Placer County.