To stain a deck properly, evaluate the existing finish first, then clean and dry the wood completely. Plan for 48–72 hours minimum. Apply a wood brightener if the surface has grayed, then use two thin coats of oil-based semi-transparent stain with back-brushing between sections. In the Auburn foothills climate, quality oil-based stain lasts 3–4 years. The prep work determines the final result. The stain application is the easy part.
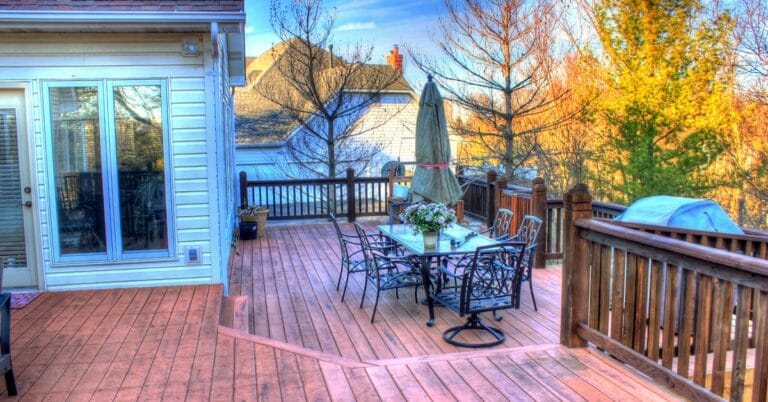
If there’s one project homeowners underestimate in the foothills, it’s deck staining. It looks straightforward, brush on stain, let it dry, done, but I’ve seen too many DIY staining jobs that looked rough after just one season.
The difference between a deck that holds its color for three solid years and one that’s peeling and weathered in twelve months is not the stain itself. It’s the prep work, understanding the wood condition, and knowing how to apply stain correctly. I’ve been staining decks across Auburn and Placer County for two decades, and I want to walk you through the process the way I do it, with the kind of detail that makes the difference.
The first step isn’t opening a can of stain. It’s figuring out what you’re working with. Does your deck have old stain that’s failing, or is it just faded? Is the wood clean, or is it weathered and grayed? What condition is the structure in? Those answers determine your approach before you ever touch a brush.
How Do You Know If Your Deck Is Ready to Stain?
This is non-negotiable. You can’t stain your way out of a bad deck surface.
- Is the old stain failing? Walk around your deck and look closely. If the existing stain is peeling in sheets, cracked, or flaking off when you run your hand across it, the old finish is done. You’ll need to strip it first. My guide on stripping and restaining a deck walks through that full process. If it’s just faded but still intact, the coating is smooth and adhered, even if the color is dull, you can overcoat it with stain. Test this by pouring a little water on the wood. If it beads up, the old stain is sealing the wood and you can recoat. If it soaks in, the stain has failed and you need to strip.
- Is the wood clean? Debris, dirt, leaves, and algae growth are all common on decks, especially in shaded areas. You’ll need to address this before staining. Stain won’t stick properly to dirty or contaminated wood.
- Is the wood weathered and gray? Old, exposed wood turns silvery-gray from UV exposure and oxidation. This is surface-level damage. It looks bad, but it’s not structural. You can address it with a wood brightener or cleaner that removes the gray layer, or you can stain over it (though the final color may be duller).
- Is there rot or soft wood? Press a screwdriver or awl into suspicious areas. If it sinks easily, you have rot. Rotten boards need to be replaced before you stain. No amount of stain will fix structural damage.

How Do You Clean and Prep a Deck Before Staining?
Cleaning is where most DIY staining projects fail. People rush this step, assuming a quick sweep and wash is enough. It’s not.
Rather have a professional handle it? Take a look at my deck staining services.
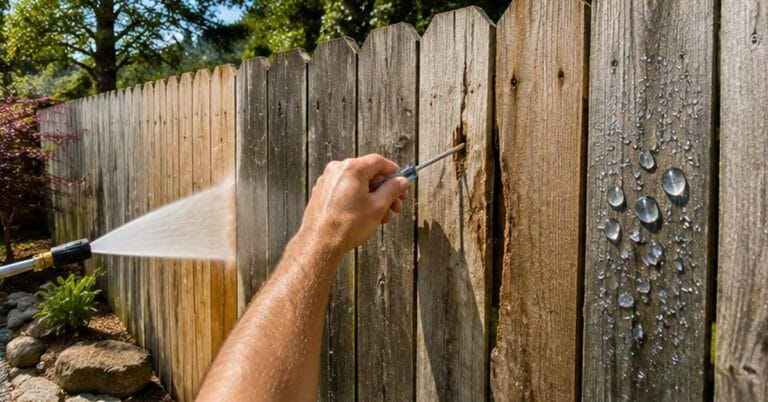
- Power wash carefully. Start with a pressure washer set to 1500-2000 PSI if you’re comfortable with the equipment. (Go higher than 3000 PSI and you’ll gouge the wood.) Focus on removing dirt, algae, and mold. Don’t blast the wood from the same spot for too long, move the wand in a sweeping motion parallel to the grain.
If you don’t have a pressure washer, use a stiff brush and a TSP (trisodium phosphate) cleaning solution or a commercial deck cleaner. Let the cleaner sit for 10-15 minutes, then scrub and rinse thoroughly.
- Let it dry completely. This is critical and often overlooked. After washing, your deck needs 48-72 hours to dry out completely. Stain cannot penetrate wet or damp wood; it will sit on the surface, get tacky, and eventually peel. If you’re in a humid climate (which we often are in the foothills), 72 hours is better than 48. Check the weather forecast and plan your work for a window of dry, clear days ahead.
Do You Need a Wood Brightener Before Staining?
After power washing, many decks still look dull or weathered. That’s where a wood brightener comes in. A brightener is a chemical treatment that restores the wood’s pH and opens the grain, allowing the stain to penetrate evenly.
- When to use it. If your deck is gray from oxidation or old age, a wood brightener will restore the natural wood color underneath and prepare the wood to accept stain uniformly. Most foothills decks benefit from brightening before staining.
- How to apply it. After the initial cleaning, apply the brightener according to the product instructions, usually with a garden sprayer or pump sprayer. Let it work for the time specified (typically 15-30 minutes), then rinse thoroughly and let dry again for 24 hours.
- The result. The wood will look fresher, lighter, and more receptive to stain. The color of your stain will be more uniform and richer because the stain is penetrating into properly prepared wood rather than sitting on a weathered, oxidized surface.

Should You Use Oil-Based or Water-Based Deck Stain?
There are two main categories of deck stain, and they behave very differently.
- Oil-based penetrating stain. This is my first choice for most decks, especially in the foothills. Oil-based stain penetrates into the wood fibers, actually sealing the wood from the inside out. It’s more forgiving to apply, it flows better and is easier to back-brush. It handles UV better and lasts longer (typically 3-4 years).
The trade-off: it has strong fumes, slower drying time between coats (24+ hours), and cleanup requires mineral spirits. Brands like Cabot Australian Timber Oil, Armstrong-Clark, and TWP are solid choices.
- Water-based stain. Water-based stain dries faster (you can apply a second coat in 4-6 hours), has minimal fumes, and cleanup is just soap and water.
The catch: it doesn’t penetrate as deeply as oil-based, it can raise the wood grain (which you then have to sand down), and it may not last as long on heavily sun-exposed decks. It’s environmentally friendlier and works fine on new cedar, but I reserve it for decks in shadier locations or where the homeowner really needs a fast turnaround.
For the Auburn foothills with our intense sun, I lean toward oil-based semi-transparent stain on natural wood and oil-based solid stain on weathered or heavily trafficked decks.
What’s the Difference Between Semi-Transparent and Solid Deck Stain?
This choice affects both durability and maintenance.
- Semi-transparent stain lets the wood grain show through. The color is subtle, the wood character is preserved, and the look is more natural. It lasts 2-3 years before needing a refresh. Recoating is easy, you just sand lightly and apply a fresh coat.
- Solid stain hides the grain and provides opaque color coverage, almost like a thin paint. It lasts longer (3-4 years typically) and hides weathering, discoloration, and previous stain colors. Recoating solid stain requires more prep because you can’t get a uniform look by just applying a thin coat on top.
New cedar or redwood decks usually look best with semi-transparent. Old pressure-treated or heavily weathered decks are candidates for solid stain.
What’s the Right Technique for Applying Deck Stain?
This is where people typically go wrong. They think stain is like paint and slap it on with whatever tool is handy. Stain requires technique.
- Choose your application tool. You have three main options: a brush, a paint pad, or a roller. A brush gives you control and works great for edges and board ends. A pad is fast and efficient for large flat areas. A roller covers ground quickly but can leave bubbles.
I typically use a combination: a pad or roller for the main deck surface and a brush for edges, railings, and tight spots. For a fast, even coverage on a big deck, an airless sprayer is ideal (but it requires masking off nearby plants and structures).
- Back-brushing is mandatory. This is the step that separates a professional finish from an amateur one. Apply stain with your pad or roller in small sections, maybe 4×4 feet, and immediately go over it with a brush, dragging the brush along the grain and feathering out the stain.
This distributes the stain evenly, fills in any thin spots, and ensures the finish won’t be blotchy. Never just roll or pad the stain and leave it.
- Work in sections. Don’t try to stain the whole deck at once. Work in manageable sections, one or two boards at a time if you’re brushing, a 4×6 foot area if you’re padding. This keeps the edge wet so you can blend sections together without lap marks.
- Maintain a wet edge. Stain is forgiving, but overlapping sections look dark and blotchy if the edges dry before you feather them together. Work methodically across the deck from one side to the other, and don’t let the edge of your stained section dry before you move to the next section.

How Much Deck Stain Do You Actually Need?
A gallon of deck stain typically covers 150-200 square feet for a first coat on thirsty (unseasoned or stripped) wood. On wood that already has a sealing stain, coverage may be closer to 250-300 square feet per gallon because the wood isn’t absorbing as much.
- Calculate your deck size. Measure the length and width of your deck and multiply. If your deck is 16 feet x 12 feet, that’s 192 square feet. For a first coat on bare wood, assume 150-200 sq ft per gallon, so you’d need 1-1.5 gallons. For a second coat, assume better coverage, so you’d need about 0.75-1 gallon.
- Factor in railings. Don’t forget the railings, posts, stairs, and fascia. These add significant square footage. For a standard raised deck with railings, add 20-30% to your calculated deck area.
- Buy a little extra. It’s better to have a gallon left over than to run short and have to remix a second batch (which won’t match the first perfectly). Any leftover can be stored for touch-ups.
How Long Should You Wait Before Adding a Second Coat?
Patience is critical here, and I see too many homeowners rush this phase.
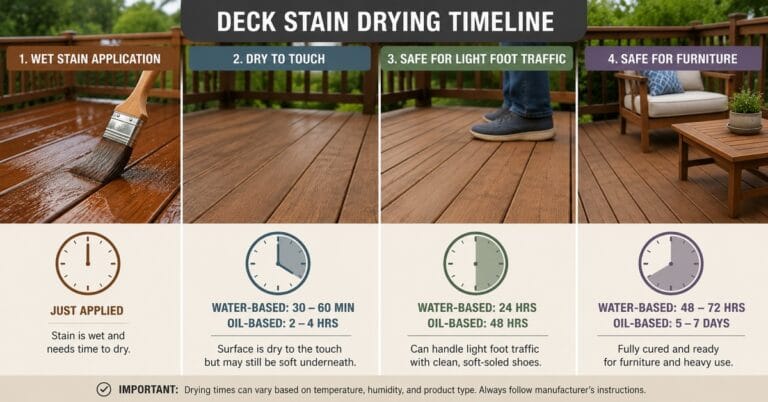
- For oil-based stain: Allow at least 24 hours between coats, and preferably 48 hours if weather permits. Don’t apply a second coat to stain that’s still tacky. The first coat must cure enough that your second coat actually penetrates, not just sits on top of the first coat.
- For water-based stain: You can typically recoat in 4-6 hours if conditions are dry, but allowing 24 hours is safer and produces better results.
- Foot traffic timing: Wait at least 24 hours before walking on the deck regularly, and 48-72 hours before putting heavy furniture back on it. Oil-based stain continues to cure for several days. Wet footprints and furniture legs leaving marks are signs of inadequate cure time.
Why Do Edge Boards and End Grain Need Extra Attention?
The edges of deck boards and the end grain (the freshly cut or exposed grain at the ends of boards) are thirsty and will drink stain faster than the face of the board.
- End grain. The tops of deck posts and the ends of deck boards are end grain. These areas absorb stain much more readily, so apply an extra coat to these areas to ensure even color. You can also apply a stain-sealer specifically made for end grain if you’re dealing with freshly exposed wood.
- Fascia and trim. The horizontal or vertical trim boards that form the perimeter of your deck get the most sun and weather exposure. Give these areas extra attention and an extra coat if needed.
- Under-deck boards. If you have a multi-level deck or an under-deck area, the underside of the boards still needs protection. If it’s accessible, stain it, it’s exposed to moisture and deserves a protective coat.
What Are the Most Common Deck Staining Mistakes?
Here’s what I see go wrong most often:
- Applying stain too thick. More stain doesn’t equal more protection. A thick coat of stain sits on the surface, stays tacky longer, and eventually peels. Stain is meant to penetrate; thin, even coats are better than one heavy coat.
- Not letting it dry between coats. Rushing the drying time leads to soft, tacky finishes that pick up dirt and footprints.
- Staining in direct sun on a hot day. The surface dries too fast, trapping moisture underneath. Stain on a cool, dry day, morning is ideal. Avoid staining in full afternoon sun on hot days.
- Forgetting to stir the stain thoroughly. Stain settles and separates, especially if it’s been sitting. Stir it completely before using, and stir it periodically as you work.

Deck staining is one of the most common jobs I take on across Auburn and Placer County, but it’s not the only one. I also handle exterior painting, interior painting, and cabinet work. If you’re looking for a residential painter in Auburn for any project around the house, take a look at everything I cover.
Frequently Asked Questions
How long does it take to stain a deck?
Prep and cleaning take 1-2 days (including drying time). Actual staining application takes 1-2 days depending on deck size and tool choice. A professional typically completes a 300-400 sq ft deck in one full day of application. If you're DIYing, add 50% more time. Total project: 3-5 days from start to full cure.
Should you use a brush or roller for deck stain?
Use both. A roller or pad covers large flat areas quickly and efficiently. A brush is essential for edges, railings, corners, and back-brushing to feather out the stain. Regardless of tool choice, back-brushing immediately after application prevents blotchy finishes.
How long after cleaning can you stain a deck?
Wait 48-72 hours after cleaning and power washing before staining. The wood must dry completely, especially if you used a wood brightener (which adds moisture). Staining wet or damp wood will result in poor penetration and peeling finish.
How many gallons of stain for a deck?
Rough guide: 1 gallon covers 150-200 sq ft for a first coat on bare wood. For a 300 sq ft deck, you'd need approximately 2 gallons for one coat or 3-4 gallons for two coats. Always buy a little extra to account for heavy absorption and miscalculation.
Can you stain a deck in the sun?
Avoid staining in direct afternoon sun on hot days. The surface will dry too fast, trapping moisture underneath and causing the stain to sit on top rather than penetrate. Early morning or late afternoon on a mild day is ideal. If your deck is in full sun, stain it on an overcast day if possible.
What's the best time of year to stain a deck in Auburn?
Spring (April-May) and fall (September-October) are ideal in the foothills. The temperatures are moderate, humidity is manageable, and you avoid the intense heat of summer. Late spring is often the perfect window, the wood is dry, it's not too hot, and you have months of good weather ahead before winter.
Staining a deck correctly takes patience, attention to detail, and the right technique. If you’re in Auburn, Granite Bay, Rocklin, Lincoln, or anywhere in Placer County and you’d rather have a professional handle the project, reach out to me for a consultation. I’ll assess your deck’s condition, recommend the right stain and approach, and make sure your deck looks great for years to come.